Are you aware that the Loofah Sponges you use for rejuvenating your skin is a plant you can grow at home? This guide will teach you how to cultivate luffa sponges naturally, covering everything from preparing the soil in your garden to the final steps of harvesting and maintenance. By diving into this process, you’ll gain a practical understanding of the plant itself and learn the best techniques for watering and ensuring your luffa thrives in the heat.
The tangible benefits include not only having a steady supply of natural sponges at your fingertips but also the joy of tending to a garden that meets your skincare needs. Addressing common hurdles such as finding the right soil conditions or the intricacies of seed planting, and growing loofah sponges this content is crafted to guide you smoothly through each phase of your luffa growing journey.
Key Takeaways of Loofah Sponges
- Growing loofahs provides sustainable sponges and enriches garden biodiversity
- Loofah plants thrive with organic cultivation, requiring minimal chemical intervention
- Different loofah varieties have unique growth needs and potential uses
- Proper harvesting and drying techniques are crucial for producing quality loofah sponges
- Saving seeds from the healthiest loofah gourds ensures a resilient future crop
Understanding Loofah Plants
As I delve into the world of luffa cultivation, understanding the life cycle of a loofah plant is foundational to nurturing these remarkable gourds. Growing loofahs naturally in your garden unlocks multiple benefits, including a sustainable source of sponges and a delightful addition to your green space. Each variety of loofah fruit, sprouting from seed to vine, brings unique qualities and uses. Let’s uncover the patterns of their growth, the advantages of a natural approach, and the diversity among loofah types while considering species.
The Life Cycle of a Loofah Plant
Embarking on the journey of growing loofah—or luffa—aegyptiaca, I’ve discovered its life cycle begins in the warmth of spring after the last frost has thawed. Planting the seeds in fertile, well-drained soil, I’ve observed their quick sprout and eager climb toward the sun. The careful gardener must protect these tender shoots from pests to ensure the development into sturdy vines adorned with yellow blossoms.
As the flowers fall away, the vegetable gourd begins to form, transforming from a small green luffa into a sizeable sponge-ready specimen over several months. Harvest time for these gourds takes place before the first frost of autumn, highlighting the need for keen attention to climate cues. In my experience, allowing the loofah to fully mature on the vine, leaving a dry, brown husk, promises a fibrous, durable sponge free of remnants from the heat.
Benefits of Growing Loofahs Naturally
When I chose to grow a loofah in my garden, I soon realized the ecological benefits it offered. The loofah grow process starts with germination, a stage in which I noticed the luffa plants closely resemble their cucumber cousins, inviting a host of pollinators to my garden. These creatures, vital for the ecosystem, improve the biodiversity and health of all my plants, not just the loofahs.
One of my favorite rewards of cultivating luffa naturally is witnessing the transformation from flowering vine to practical sponge. The experience taught me that luffa aegyptiaca require minimal intervention, thriving on organic practices without the need for synthetic chemicals. This hands-off approach results in a pure, eco-friendly sponge ready for countless household uses and compostable after its lifecycle, reducing waste and promoting sustainability.
Different Varieties of Loofah Gourds
In my garden, I’ve grown different varieties of loofah gourds, each with its own characteristics. The most common, Luffa aegyptiaca, swiftly stretches upwards needing a strong trellis for support. This ensures ample sunlight reaches each leaf, promoting growth and leading to a bountiful harvest. Luffa acutangula, on the other hand, offers a ridged and slightly bitter fruit that’s often preferred in culinary uses when young.
Adapting to the local climate is fundamental when growing these gourds. For instance, I found that Luffa aegyptiaca thrives in warmer climates and requires a longer growing season, which challenges gardeners in cooler regions. Integrating rich compost into the soil has been paramount, fostering healthy plants resilient to heat stresses. This practice not only nurtures the loofah plants but also contributes to the overall vitality of my garden ecosystem.
Preparing Your Garden for Loofah Planting
Preparing the space for luffa seedlings in your garden demands attention to a few crucial steps: selecting an optimal location, enriching the soil, and installing supportive structures. Whether in a temperate climate or the foothills of a mountain, these initial acts set the stage for successful transplanting and growth. Members of the cucurbitaceae family, luffa plants require sufficient sunlight and climbing space to flourish. The upcoming sections will equip you with knowledge on how to establish these foundational elements effectively.
Choosing the Right Location
In my gardening endeavors, choosing the right location for planting luffa sponges is as crucial as selecting a spot for your prized zucchini. The spot must receive plenty of direct sunlight, as luffa plants love the sun just as much as any member of the cucurbit family. I’ve learned that the ideal location is one where the sun kisses the leaf for a minimum of six hours a day, ensuring that the plants receive the energy they need for optimal growth.
Another key factor when sowing luffa seeds is ensuring excellent soil drainage. I’ve frequently witnessed how standing water can lead to root rot, which is detrimental to these sponge-producing vines. By enriching the soil with organic matter and perhaps a balanced, slow-release fertilizer, I’ve created an environment where luffa aegyptiaca can thrive. Finding a spot that’s naturally elevated or incorporating a raised bed can significantly assist with drainage, safeguarding the health of the burgeoning plants.
Soil Preparation and Enrichment
When it comes to planting luffa acutangula or its close relative, the luffa aegyptiaca, the foundation of success lies in the soil, much like the foundations required for okra or similar plants. I enrich my soil with a healthy mix of compost and aged manure to ensure a nutrient-rich base. This preparation gives the loofah plants the best possible start, akin to raising seedlings in the controlled environment of a greenhouse.
fellow gardeners in environments like Canada, where growing seasons can be short, I’ve learned that warming up the soil before planting is key. This can be achieved by using black plastic mulch or starting seedlings in pots indoors. Moreover, I ensure to include a dose of potassium-rich fertilizer akin to the nourishment soap provides for skin, which supports the
plants’ growth and
- Begin with integrating rich organic material to boost nutrient content.
- Introduce a layer of black plastic mulch to warm the soil, if necessary.
- Supplement with potassium-rich fertilizers to enhance growth and durability.
This preparatory work paves the way for a successful and bountiful loofah harvest.
Setting Up Support Structures
In my experience, sturdy support structures are imperative for the successful cultivation of luffa sponges. From the moment these vines begin to grow, I ensure their tendrils have access to trellises or fences, which facilitate vertical climbing. This not only saves valuable horticulture space but also aids in air circulation, reducing the risk of fungal diseases and promoting a healthier crop. It’s a sight to behold as the plants reach upwards, their blossoms frequented by bees eager to pollinate.
To prepare for the impressive weight of mature gourds, I’ve found that using robust materials like wood or metal for support frames is essential. I apply mulch at the base to retain soil moisture and regulate temperature, creating an environment conducive to strong fiber development in the luffa gourds. Much like nurturing a bean plant that demands a stake to cling to, providing reliable support early on leads to a bountiful harvest of natural sponges without undue stress on the plants.
Planting Loofah Seeds Successfully
As I continue our journey through the natural cultivation of loofah sponges, let’s focus on the initial phase: planting. Contemplating whether to start seeds indoors or direct sowing them is key, as is timing your efforts correctly to align with the growing seasons in regions like the United Kingdom or Australia. I’ll share insights on optimal planting times accounting for varying climates and the crucial steps for safely transplanting your delicate seedlings into the garden, ensuring strong root development without the need for substances like exfoliation .
Starting Seeds Indoors vs. Direct Sowing
Starting luffa seeds indoors allows a head start on the germination season, crucial for regions with shorter summers. I’ve learned that this method gives seedlings the chance to develop away from the threats of mildew and pests common in outdoor settings. With careful monitoring and perhaps light pruning to encourage bushier growth, these resilient species can be coaxed into sturdy plants ready for the challenges of the garden.
Direct sowing, on the other hand, suits gardeners in climates where the warm season is long enough to accommodate the luffa’s growth cycle. By planting seeds directly into the garden, I’ve observed the roots establish more vigorous systems undisturbed by transplanting. This method also fits well into my eco-friendly gardening practices, reducing the need for pots and saving resources. However, to prevent issues like powdery mildew , ensure your luffa hs are spaced adequately to promote air circulation, vital for keeping these plants healthy until they mature into the perfect natural scrubber for exfoliation.
| Method | Pros | Cons |
|---|---|---|
| Starting Seeds Indoors | Early start, control over growing conditions, reduced pest and mildew risk | Requires transplanting, may need pruning, less robust root systems |
| Direct Sowing | Stronger root development, no need for pots, aligned with natural growth | Dependent on long summers, risk of mildew, requires careful spacing |
Optimal Planting Times for Loofah Sponges
Pinpointing the best timing for planting luffa seeds is pivotal to their growth and, ultimately, the yield of natural sponges for your kitchen. In my gardening, I aim to plant after the risk of frost has passed, ensuring the soil is warm enough to foster germination. Typically, this means waiting until late spring or even early summer, times when conditions are less conducive to issues like powdery mildew that thrives in cooler, damp environments.
When considering luffa planting times, I also gauge the local rainfall patterns and ensure that there’s a stretch of clear weather ahead. Rain can be a friend to gardeners but too much can invite unwanted guests such as ants into the garden, or cause complications similar to those faced when growing tomatoes, like blossom end rot. Here is a brief timeline to consider for successful luffa seed planting:
- Monitor the local forecast for the last expected frost date.
- Prepare the soil and garden area as the final frost approaches.
- Sow seeds directly into the garden or start seedlings indoors, depending on your climate.
Transplanting Seedlings Into the Garden
Transplanting luffa seedlings into the garden is a delicate phase in the cultivation process where I am keenly aware of the needs of these young plants. To protect them from insects and other natural threats, I carefully select a location near a tree or fence, which can provide optional shade and support as the young luffa s acclimate to their new environment. This strategic positioning also scaffolds the transition from the secure shelter of indoors to the more variable outdoor conditions.
During the transition, I’ve found it beneficial to harden off the seedlings, gradually introducing them to the outside world to enhance their resilience—much like one might slowly adjust to the temperature when stepping into a shower. Ensuring the roots establish themselves without disturbance is fundamental, requiring a balance of gentle handling and firm placement into the prepared, nutrient-rich luffa acutangula . This attention to detail contributes to a robust growth cycle, setting the stage for a successful harvest of natural sponges.
Caring for Your Loofah Plants
As I tend my kitchen garden, I’ve honed crucial techniques for nurturing luffa plants to their full potential. Proper watering ensures consistent moisture without over-saturation, mimicking the favorable conditions one might find in a pollytunnel. Organic fertilization methods, like incorporating herb compost, fortify my luffa s against stress and aid in lush growth. Vigilance against pests and diseases keeps my plants healthy without reliance on harsh chemicals. And to optimize yields, I’ve learned tactics to encourage pollinators, keeping my garden abuzz with activity. Each of these elements is vital for a thriving luffa harvest.
Watering Techniques for Healthy Growth
In my own gardening practice, I’ve found that careful watering is crucial for healthy luffa plant growth, especially since these plants are sensitive to both over-watering and drought. During the critical early stages of growth, I use a watering regimen that keeps the soil consistently moist but not waterlogged, to prevent the roots from rotting. As the plants mature, I reduce the frequency but increase the depth of watering to encourage deeper root development, which helps guard against the dryer conditions that might come with a hot summer or an unexpected freezing spell.
Another technique that has proven successful in my Luffa garden is using a bucket watering system to provide a slow, steady supply of water directly to the base of the plants. This not only conserves water but also prevents the leaves from getting wet, which can reduce the risk of fungal diseases. Moreover, I always ensure my luffa plants have the necessary support as they grow; I regularly prune them to maintain airflow and sometimes supplement natural sunlight with a grow light during the shorter days of the year, ensuring my loofahs exfoliation have the energy they need to flourish and eventually peel into natural sponges:
| Stage | Activity | Benefit |
|---|---|---|
| Germination | Maintain consistent soil moisture | Encourages healthy sprouting without overwatering |
| Growth | Deep, infrequent watering with bucket system | Promotes deep root development; conserves water |
| Maintenance | Regular pruning and use of grow light when necessary | Supports vigorous growth and mitigates risk of disease |
Natural Fertilization Methods
In my experience, reinforcing the nutrient content of soil in a natural and sustainable way is well worth a visit to the local garden centre. I mingle organic material like composted watermelon rinds – rich in nitrogen – and aged onion skins – high in sulfur – into the luffa luffa aegyptiaca bed. This natural fertilization technique boosts plant immunity, enhancing their resistance to common diseases and pests, ensuring my luffa plants flourish from spring through to autumn.
Another method I’ve found effective involves a homemade compost tea, concocted from my kitchen scraps and garden waste, assisted by the ever-reliable luffa aegyptiaca towel to filter solids. Applying this nutrient-rich liquid gives the plants a healthy dose of essential minerals to support their vigorous growth. It’s an approach that feels like nurturing my loofahs with a balanced diet, watching them develop robust fibers ready for harvest and use in the home.
| Material | Nutrient | Benefit to Loofah Plants |
|---|---|---|
| Composted Watermelon Rinds | Nitrogen | Supports leafy growth and overall plant vigor |
| Aged Onion Skins | Sulfur | Enhances disease resistance and plant immunity |
| Compost Tea | Assorted Minerals | Provides a full spectrum of essential nutrients |
Managing Pests and Diseases Organically
In my garden here in the United States, I apply organic methods to tackle pests and diseases that may target luffa plants. A practical example is using row covers early in the season to guard the young seedlings from bug attacks and frost damage. The lightweight fabric allows sunlight and water through, but keeps out insects, such as the aphids that might otherwise hamper the growth of my luffa gourds.
Nurturing luffa sponges as houseplants during harsher climates has taught me the importance of scarification for seeds, and how it effectively wards off common fungal problems. Delicately nicking the seed‘s coat prior to planting speeds up germination and produces a stronger, more vigorous plant that’s inherently more resistant to diseases, acting much like the pollinator that emerges robust from its cocoon, ready to face the world.
Encouraging Pollination for Better Yields
In my botanical garden, the strategy for attracting pollinators to the luffa plants is two-fold. First, I apply organic fertilizer, which enriches the soil with nutrients, thereby encouraging vibrant blooms that are irresistible to bees and butterflies. This organic approach ensures that my luffa aegyptiaca gourds have ample sunlight exposure, vital for the plant‘s flesh to develop the fibrous texture ideal for sponge-making.
Additionally, I’ve learned to observe the flowering patterns closely, offering supplemental hand-pollination when necessary to enhance yields. By gently transferring pollen from male to female flowers, I mimic the natural process that might be limited in urban luffa acutangula settings, ensuring the lush growth and fruitful maturation of my luffa crops.
Harvesting and Processing Loofah Sponges
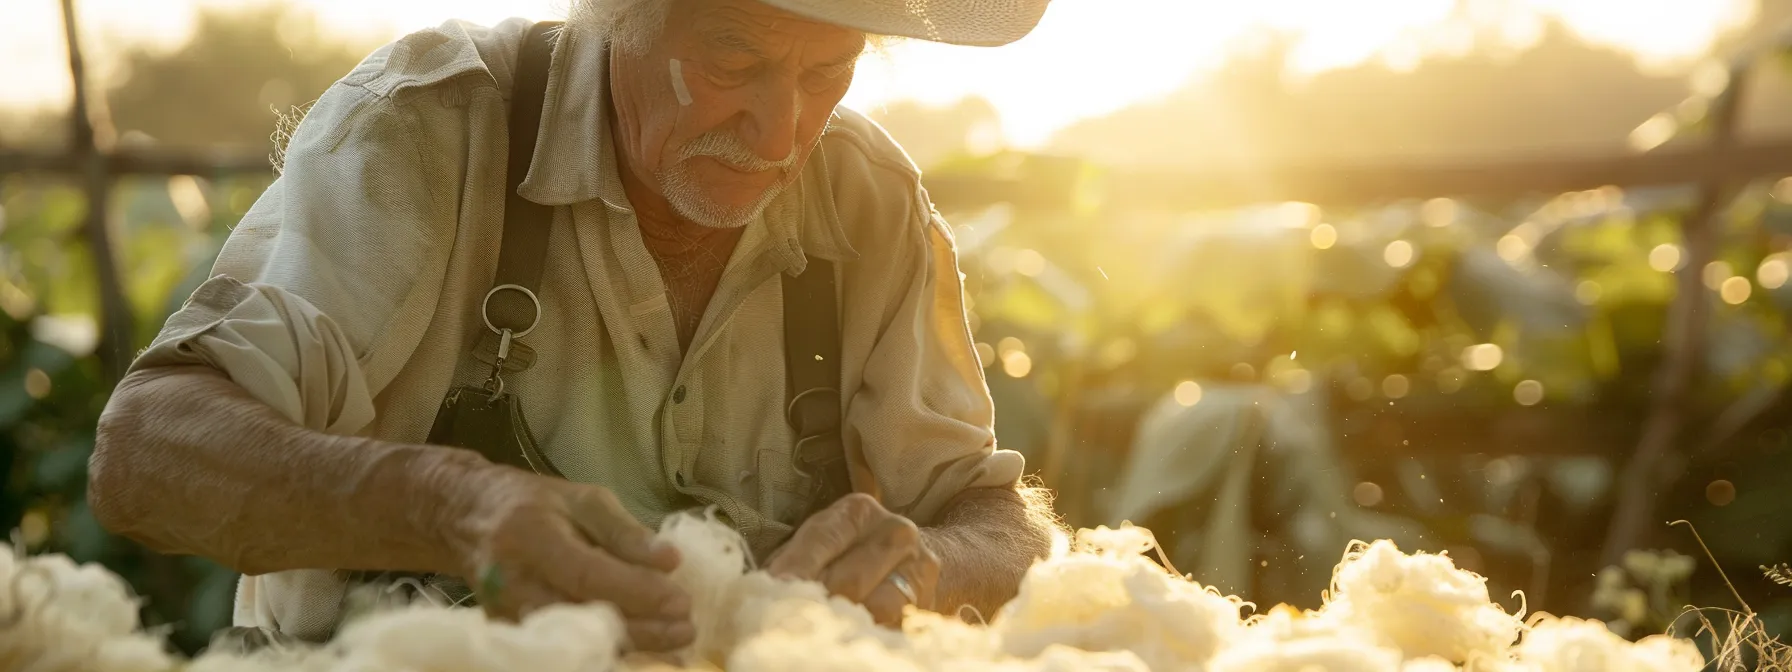
Reaching the harvest stage in luffa sponge cultivation is a rewarding milestone. Recognizing the ideal time to harvest luffa gourds is akin to identifying the perfect pumpkin ripeness, with cues tailored to your hardiness zone. In the forthcoming sections, I’ll illustrate a step-by-step guide to processing your sponges, ensuring they are peeled and cleaned properly. Furthermore, understanding the importance of humidity levels, much like when storing carrots and radishes, is essential for drying and storing your loofahs to maintain their integrity and extend usability.
Recognizing When to Harvest Loofah Gourds
In my horticultural pursuits, I’ve come to recognize the prime moment to harvest luffa gourds, which is when they transition in color from deep green to a yellowish hue. The outer skin becomes more papery and feels lighter as the fruit dries, a clear indication that the internal fibers are ready for processing. It’s a striking difference from harvesting cut flowers or vegetables like potatoes and garlic, where you look for bloom perfection or bulb size respectively.
Harvesting in my container garden taught me to gently squeeze the luffa ; if it emits a hollow sound, it’s time to cut it from the vine. Unlike the container-grown potato which signals readiness through its foliage, or garlic whose readiness is shown when its leaves turn brown, the maturity of a luffa aegyptiaca relies heavily on tactile and visual cues. This ensures I can process them into natural sponges at the optimum stage, maintaining their quality and functional longevity.
Step-by-Step Guide to Processing Sponges
Following the successful summer growth and timely harvest of my luffa gourds, I embark on the processing stage, which transforms these unique plants into versatile personal care products. The first step is peeling the drier outer layer, revealing the fibrous interior. It’s a delicate procedure where I ensure every bit of the plant matter is removed—similar to peeling a summer squash—without damaging the exfoliation sponge itself. Once peeled, I rinse the sponge thoroughly to clear out any remaining seeds and pulp.
The final part of the loofah processing involves a step that’s as vital as seed saving for the next season’s cultivar selection: drying. I lay out the sponges in an area with good air circulation, away from direct sunlight that could hasten decay rather than drying. This stage is crucial as it prevents powdery mildew or other diseases that could spoil the loofah, ensuring they are perfectly cured and ready to be incorporated into personal hygiene routines or used as natural cleaning scrubbers around the house.
Drying and Storing Your Natural Loofahs
Drying your loofahs correctly is paramount to prevent mold, which can turn your hard work into waste. After rinsing off the pulp and seeds thoroughly, I like to shake off excess water and lay the luffa out to dry in a well-ventilated space, free from direct sunlight. This step ensures the luffa maintains its tough, scrubby texture, perfect for when it’s time to exfoliation to the wash and tackle dirt and grime effortlessly.
| Step | Action | Reason |
|---|---|---|
| 1 | Rinse and Remove Pulp | To clear any remaining plant matter and prepare for drying. |
| 2 | Lay Out to Dry | To ensure the loofah dries evenly without developing mold. |
When considering long-term storage, I like to bear in mind the challenges I’ve faced with garden manure; the key is ensuring it is dry before storage to prevent beetles and other pests from invading. Similarly, loofahs must be completely dry before you store them in a cool, dry place where air can circulate. If you plan to sell some of your cucurbitaceae, making luffa seeds available for sale, remember to select the best specimens for seeds before the drying process to ensure the continuity of your loofah farming success.
Utilizing and Maintaining Loofah Sponges
With my harvested loofah sponges now ready, I’ll share creative ways to use them, ensuring they bring value beyond the garden. Proper cleaning and care extend their life, and I’ll demonstrate how to do that. I also understand the importance of saving loofah plant seeds for future planting. Whether you’re searching for “luffa seeds near me” or looking for “luffa plants for sale,” preserving your best seeds means you’ll have quality luffa sponge seeds for the next season.
Creative Uses for Loofah Sponges
After successfully growing loofah plants, I discovered a variety of creative applications for these natural sponges. The rugged texture of a grow luffa sponge makes it perfect for exfoliating skin in the shower or as an eco-friendly kitchen scrubber for dishes. By saving some loofah gourd seeds, I can ensure a continuous supply of exfoliation sponges while incorporating sustainable practices in my daily routines.
I have also found that when gifting luffa loofah crafts to friends and family, they’re always impressed with the functionality and homegrown aspect. A growing luffa plant offers more than just a harvesting opportunity for exfoliation, it becomes a source of handcrafted soaps and pot scrubbers, adding personal value to the gifts. Here are a few unique ideas I’ve tried with my loofah harvest:
- Creating homemade loofah soaps by embedding slices of the sponge into glycerin or melt-and-pour soap bases.
- Designing natural air fresheners by slicing the loofah into discs and soaking them in essential oils.
Cleaning and Caring for Your Loofahs
After I harvest my luffa gourds, keeping them clean ensures they remain safe and effective for personal and household use. I regularly cleanse the luffa sponge in a solution of diluted vinegar or baking soda to disinfect and neutralize odors. This not only extends the life of the sponge but also maintains exfoliation that is crucial for items used in bathing or cleaning kitchenware.
Maintaining my homegrown loofah involves allowing it to dry completely between uses to prevent bacterial growth. I hang the grow loofah sponge in a well-ventilated area, ensuring it gets plenty of air. This simple care routine, which I apply after each use, contributes to a durable and sanitary loofah, perfect for those who choose to grow luffa from seed for sustainable living.
Saving Seeds for Next Season’s Planting
In my practice of growing luffa from seed, I’ve learned that saving seeds from the healthiest and most robust luffa gourds is essential for next season’s planting. After I harvest luffa, I select the best gourds with the ideal fibrous texture and let them dry thoroughly. Once completely dried, I carefully open them to extract the seeds, which I then store in a cool, dry place, ensuring their viability for the next growing cycle. species
This careful selection not only guarantees the quality of future growing loofah seeds but also embraces the sustainability of my gardening endeavors. By selecting and saving seeds from the best performing growing luffa gourd plants, I am able to enhance the resiliency and productivity of next year’s harvest. This practice creates a self-reliant cycle that maintains the integrity of my loofah crop and enriches the garden soil‘s ecosystem over time.
Frequently Asked Questions
What exactly is a loofah plant?
The loofah plant is a fast-growing vine from the cucumber family, known for its fibrous fruit commonly used as a natural exfoliator in baths and showers.
How do I prepare soil for loofah planting?
To prepare soil for loofah planting, enrich it with organic compost, ensure good drainage, and maintain a pH between 6.0 and 7.5 for optimal growth.
When is the best time to plant loofah seeds?
The best time to plant loofah seeds is after the last frost when soil temperatures consistently reach at least 70°F, typically in late spring or early summer.
What care do loofah plants require to thrive?
Loofah plants require full sun, well-drained soil, regular watering, and trellising for support to promote healthy growth and abundant sponge gourd production.
How do I process loofah sponges after harvesting?
After harvesting, peel off the luffa’s outer skin, remove seeds, and submerge in a water and bleach solution to clean and whiten the sponge before letting it dry thoroughly.


